University Stores Requisition Form (BP Logix)
- BP Logix Background
- Completing This Form
- How to find a Saved Form
- Business/Account Manager Approval
- The Process
BP Logix Background
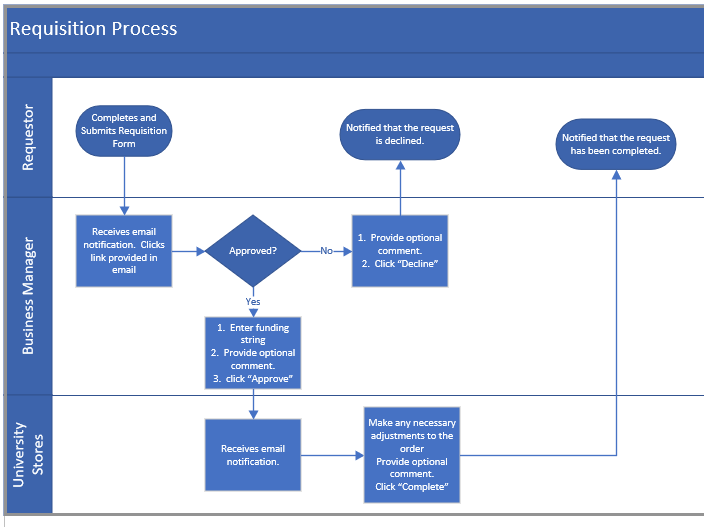
BP Logix is a new software that will allow us to create a process based on a form and its inputs. The inputs of this form will be used by University Stores to gather your requested supplies, bill the charges to the requesting department's budget, and fulfill your order. The process built will automatically notify the appropriate individuals as the process progresses. See the section titled "Stores Requisition Process" for a diagram of this process.
Completing This Form
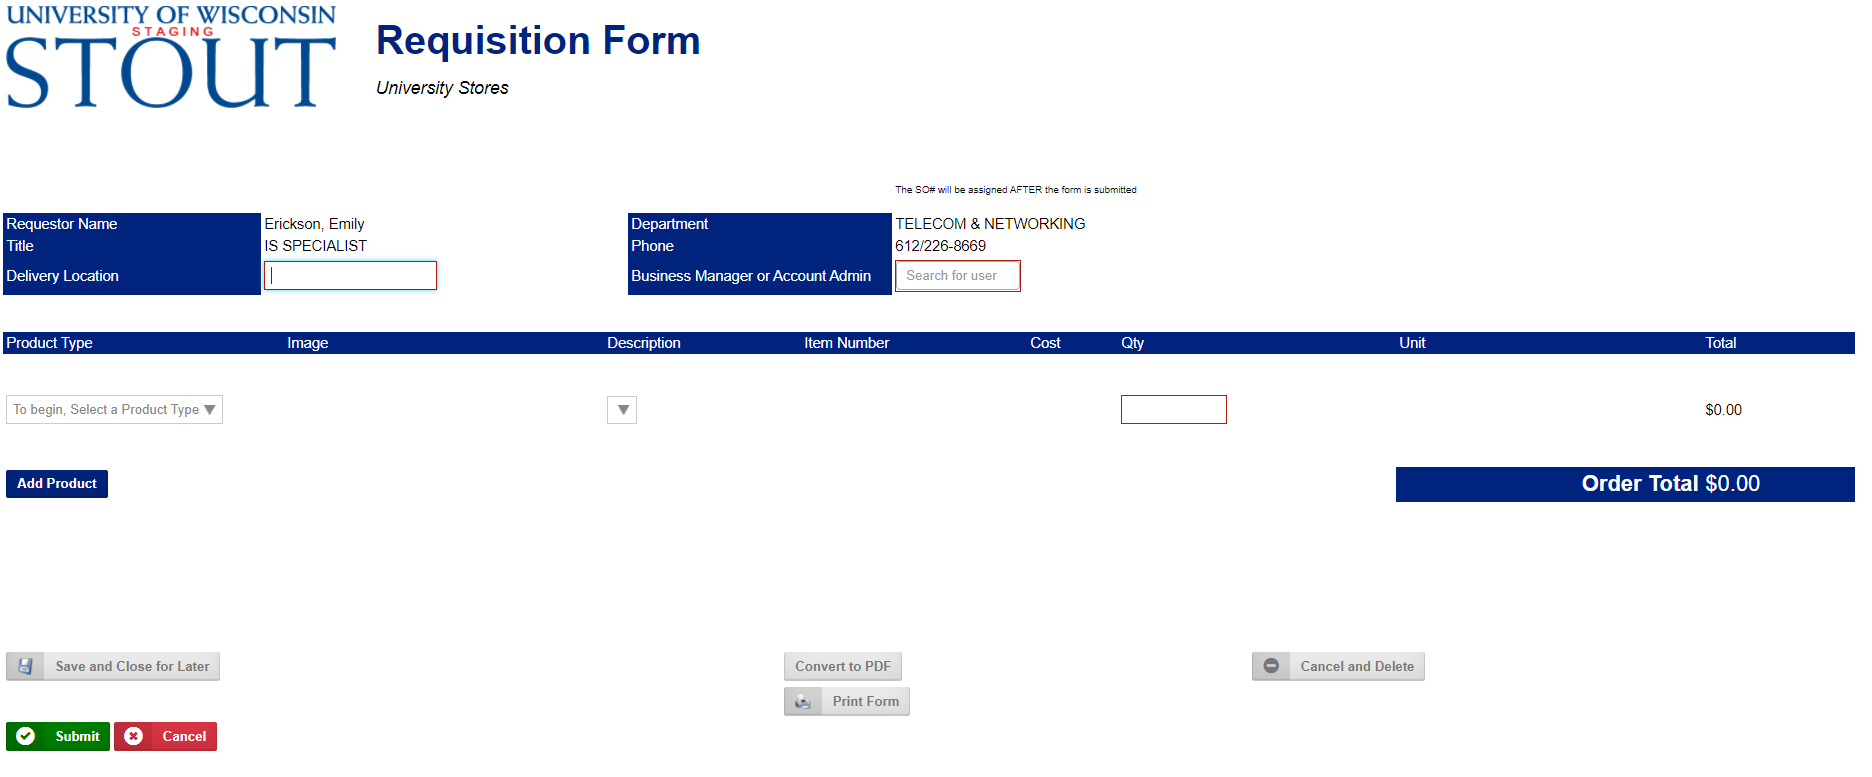
When you click on the form to fill it out, the form will know who you are based on your log in credentials. The fields you must complete will appear as boxes or dropdowns. For example in the image below, you can see that you need to provide a Delivery location, Business Manager, and Product Type.
NOTE: If your name does not appear in the Requestor Name field, then the previous user of your device did not log off. You will need to log off and log in with your credentials. It is very important to be sure you log off when you are done using a shared device!
Delivery Location
Please enter either Pick up or a building name and room number. If you enter “Pick Up”, you will be notified when your items are ready to pick up at University Stores. If you provide a building and room number, the items will be delivered to that location.

Business manager
To select a business manager, you will need to enter your department business manager’s LAST NAME first. To search use the LASTNAME, FIRSTNAME format. For example. Smith, John

Your business manager will be notified and will be required to provide a funding string.
You cannot be both the requestor and the business manager.
Adding Your Items
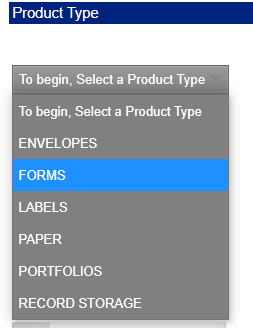
- Begin by selecting a product type. Click on the dropdown and make a selection.
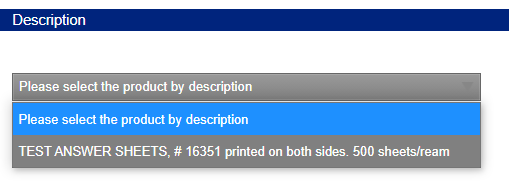
- After you select a product type, the Description dropdown will fill with the products that match the selected product type. You can change your product type, and the description options will change.
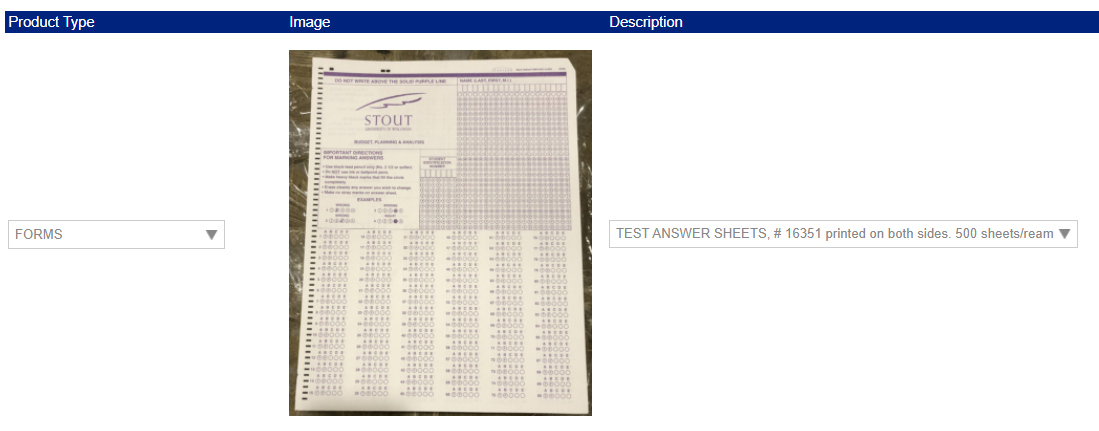
- After you make your selection in the description dropdown, the image of the selected item will appear.
- To complete the item entry, enter the quantity needed, then hit the TAB key on your keyboard.
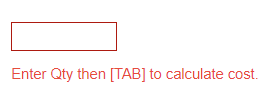
- When you hit tab, the line total will calculate.

- After you make your selection in the description dropdown, the image of the selected item will appear.
- (Optional) To add another item to your order, click the Add Product button and repeat the steps above starting with Product Type.

- As you add quantities to line items, your order total will update.

- When you have added all items to your order, click the Submit button.
OR If you are not ready to submit your order, you can click the Save and Close for Later button.
How to find a Saved Form
- Log into BP Logix by clicking HERE.
- Your saved forms will be listed on your Task List
This task list shows 2 tasks, notice the second task shows "You have not completed this form". This is the form that was saved for later. Click this form to make edits.
- The form will open, and you can pick up where you left off.

Business/Account Manager Approval
If you are a business manager or account manager, you will need to provide the budget string that the supplies will be billed against.
When the requestor submits their form, the Business/Account Manager will receive the below email message.
To complete your task
- Select the Click Here to Perform Task link in the email. This will open the form in BP Logix.

- When the form opens, you will see the Funding String field will be highlighted.
- To approve the request, you must provide a complete budget string, then click approve, you may also provide a comment.
- To decline the request, no inputs are needed, you may simply click decline. Although it is recommended that you provide a comment to indicate why the request was declined.
- To send the request back to the requestor, click the Return to Initiator button. Be sure to indicate in the comments why you are sending it back.

The Process
Below is a diagram of the requisition process.
For further help with this form, please contact University Stores at (x2193) or email centralreceivingUWstores@uwstout.edu.