Outlook (Web App): Sharing Calendars
This guide will overview the Web option to share calendars in Outlook.
Sharing a Calendar
- In the browser version of Outlook, open the Calendar tab.
- In the left folder pane, right-click the calendar you are sharing and click Sharing and Permissions.

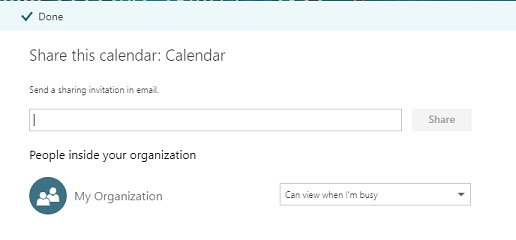
- This will open a pane with all of your calendar sharing details.
- Enter the username of the person you'd like to share your calendar with. The list will auto-populate from the Outlook directory as you type. You can select their username from the list.

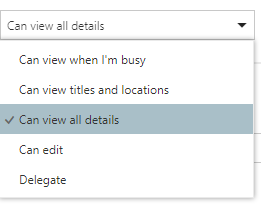
- You will need to set permissions for this new user. The meaning of the permission levels is discussed at the bottom of this article. Permission levels are as follows:
- When you are satisfied with your selections, click Share then Done.
Opening a Calendar
- In the left menu bar of the Outlook calendar window, select Add Calendar

- Within the Add Calendar menu, select Add from directory, and then select your account from the drop-down menu

- Type in the person's name or Stout username. A list will auto-populate from the Outlook directory as you type. Select the calendar you wish to add.

- Using the drop-down menu, select a calendar group to add the calendar to (ex. People's Calendars) and then select Add.

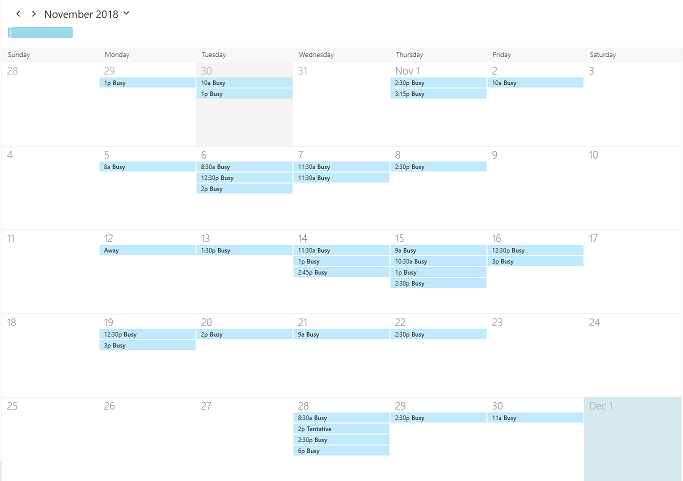
- You will now see the new calendar.
Removing a Calendar
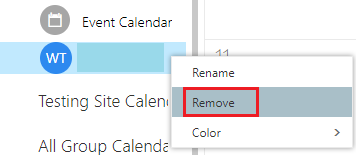
- Right click the calendar you'd like to remove and select Remove.
Permission Levels
- Can view when I'm busy:
Allows the person to see when you are busy but doesn't include any details (such as event location). - Can view titles and locations:
Allows the person to see when you are busy and the title and location of the event. - Can view all details:
Allows the person to see when you are busy and all the details of the event. - Can edit:
Allows the person to see all event details and edit the calendar. - Delegate:
Allows the person to see all event details, edit the calendar, and share the calendar with others.


