Perceptive Content: Perceptive Experience Signature Stamp
Placing signature stamps on documents using Perceptive Experience
Signature Stamps
Adding the signature stamp annotation. (Perceptive Experience will remember the last stamp used and adds it to the top of the "Recently Used" list.)
- Select the Annotation Icon and then choose Create Annotation.

- Move the square cursor to the area that needs the signature stamp and click within the document where the stamp will be placed.
- The annotation dialog box will appear. Select the appropriate annotation for the signature stamp.

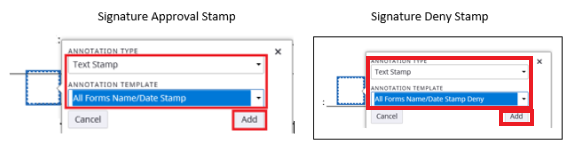
- Select the text stamp annotation.

- Next you will need to choose the kind of stamp you need "All Forms Name/Date Stamp".

- Click on Add to place your signature stamp on the page:

- Here are the annotation settings for the approval or deny stamp:

- This is what you will see as you create your signature stamp and other annotations with Experience.
