Topics Map > Service Catalog > Communications and collaboration services > Email
Outlook (Web App): Sharing Email Folders
Step 1 - Logging in
Log into Outlook Web App with Stout username and password
Step 2 - Sharing a specific folder
Navigate to the folder that you want to share
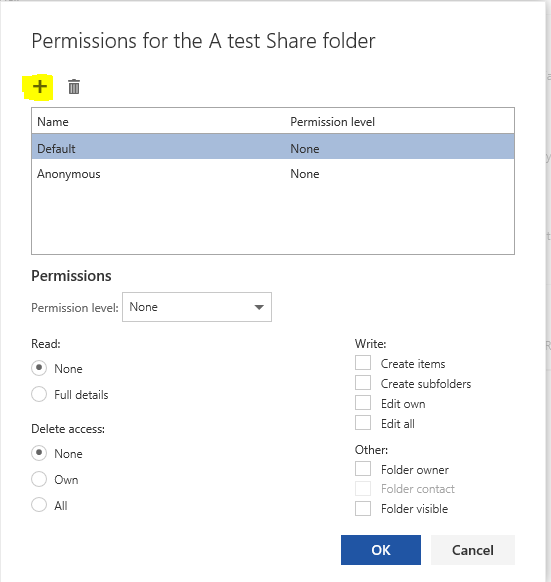
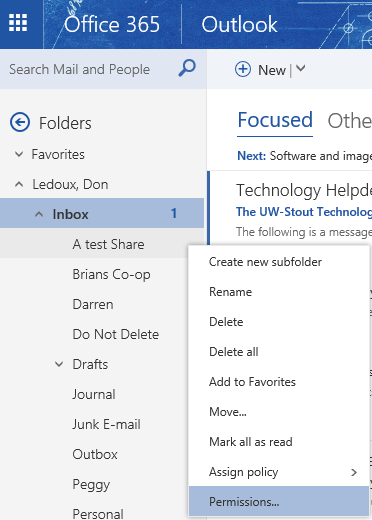
Right click on the folder you wish to share and select permissions
Step 3 - Find User
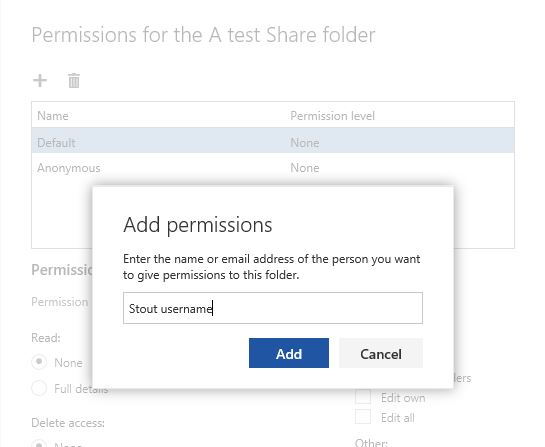
Click "+" to add user
Type in the Stout username of the desired recipient until it is listed in the directory. Click on the address or user, which will then fill in box with users information.
Step 4 - Add User
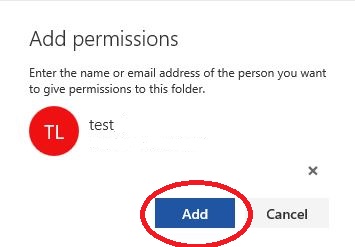
Click the add button, which will add the user account to the folder you are trying to share.
Step 5 - Set Permissions
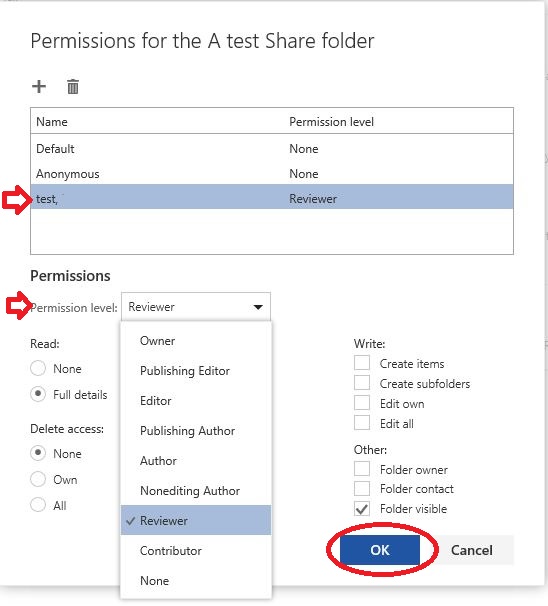
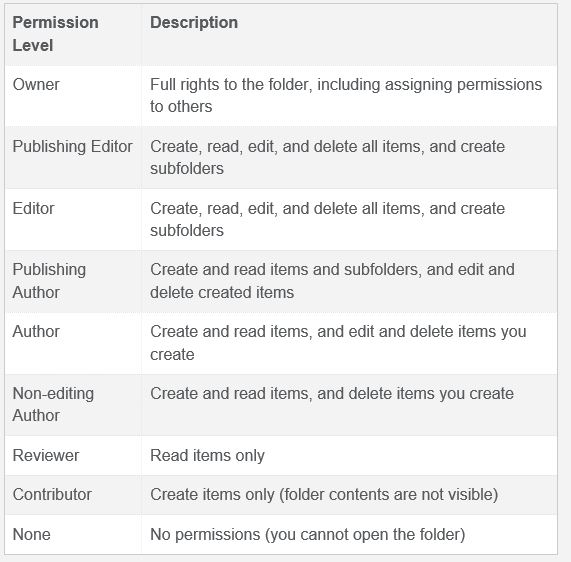
Highlight the user that was just added and then go to drop down list and to choose and set the permission level. Warning: It is recommended to give the least amount of permissions as possible and be cautious. Some permissions levels will allow for folder and email deletion. Note: A list of permissions can be found below.
Note: If you need to revoke or change permission levels for users in the future, this is the place where you would do this.
Permission Level Descriptions:
Step 6 - Permission to View Folder Shared
In order for users to see the folder that was just shared, access must be granted to email account level.
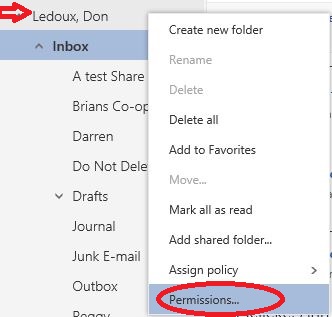
Right click on username and select permissions
Step 7 - Set Checkbox Folder to Visible
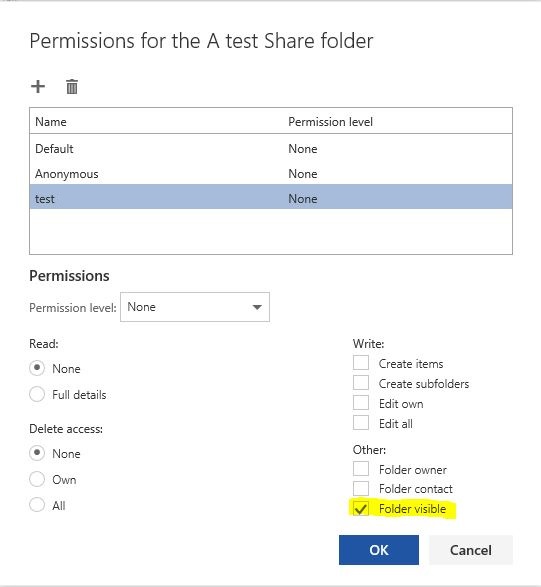
Highlight the user the folder was shared with, set folder to visible, and click OK. Once this is done it is recommended to send a courtesy email to the user the folder was just shared with (No automatic notifications are sent for recently shared folders). Include the directions to knowledge base article Outlook (Web App): View a Shared Email Folder or [Link for document 72931 is unavailable at this time]

